
🧙🛜 WarWandering: Pt 1
Wardriving, warwalking, warscootering, etc. is the process of surveying wireless networks and devices in an area, generally done from a car or portable setup. This can aggregate information on security configurations and other information to identify vulnerable networks & interesting devices. In this initial post I’ll provide some background on my wardriving project, detail my setup, and set the stage for my plans post-data collection.
Background & Goals
This project started as a final for my Cybersecurity Analytics class. The overall requirements for the project were fairly open-ended, but it had to involve some sort of data collection, and analysis. I wanted to dig into something fun, and had a WiFi Hacking meeting for CCSO coming up so I decided to propose the project “Surveying Wireless Network Configurations on Campus”.
My goal for the project was to build a portable wardriving rig that was reasonably priced to collect information about WiFi Networks on campus, and then analyze the collected data and create visualizations. To make this happen, I decided to build a rig using a spare Raspberry Pi running Kismet. Kismet is a wireless monitoring tool that can digest information from various sources such as bluetooth, GPS, WiFi, etc.
We’ll use Kismet to ingest data about wireless networks in the area, and then after going wardriving we’ll ingest the data into Elastic for easy searching, visualization, and analysis.
Hardware Setup
Bill Of Materials
Here’s a BOM for everything I used during this project:
- Hardware Freight Ripoff Pelican Case x1
- Raspberry Pi 5 x1
- UBlox-7 GPS Dongle x1
- RP-SMA Extenders for WiFi Antennas x2 Pairs (One per ALFA)
- ALFA AC1200 Wireless Adapter x2
- Power Bank x1
- JB Weld Epoxy x1
- RTL-SDR x1 - Optional
This setup will allow us to gather information about bluetooth devices, wireless devices, location, and more.
Assembly
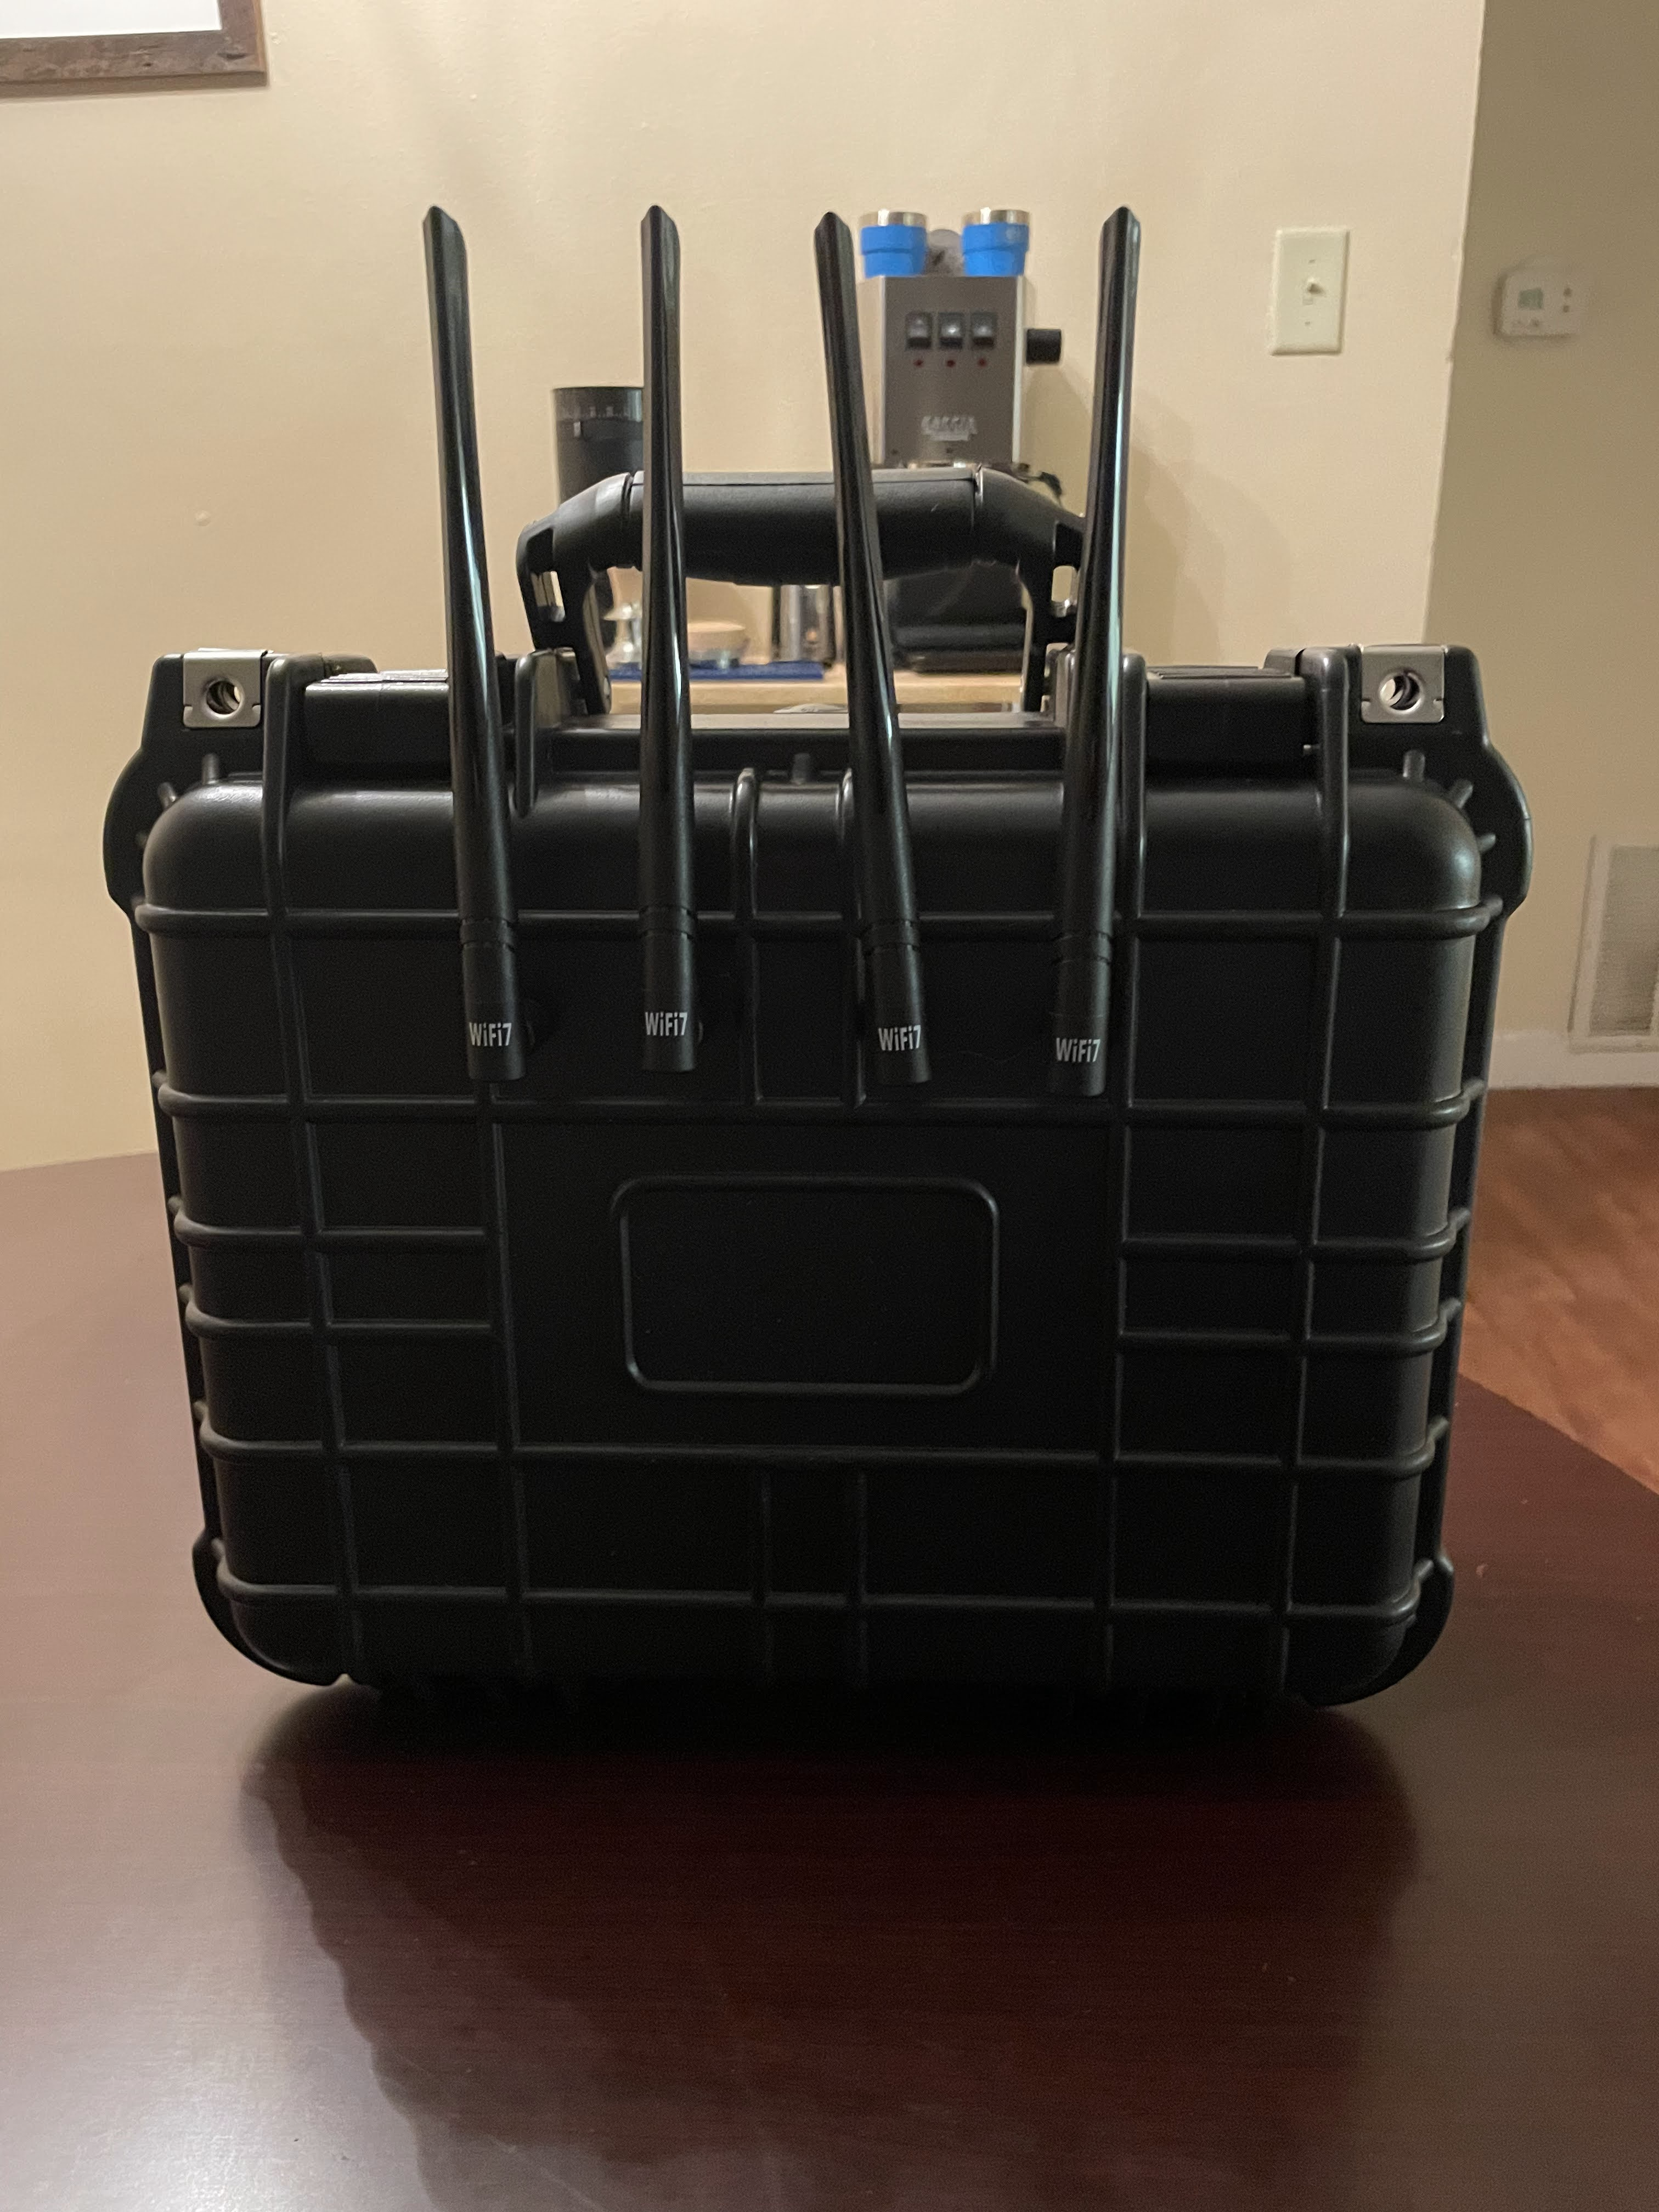
The first thing to do is assemble the actual rig itself, I started out by drilling four holes in the top of the case for the SMA extenders. These will let us mount the WiFi Antennas on the outside of the case, which will both look sick and reduce attenuation. In retrospect, I didn’t go with the best placement, but it works well enough for what we’re doing.
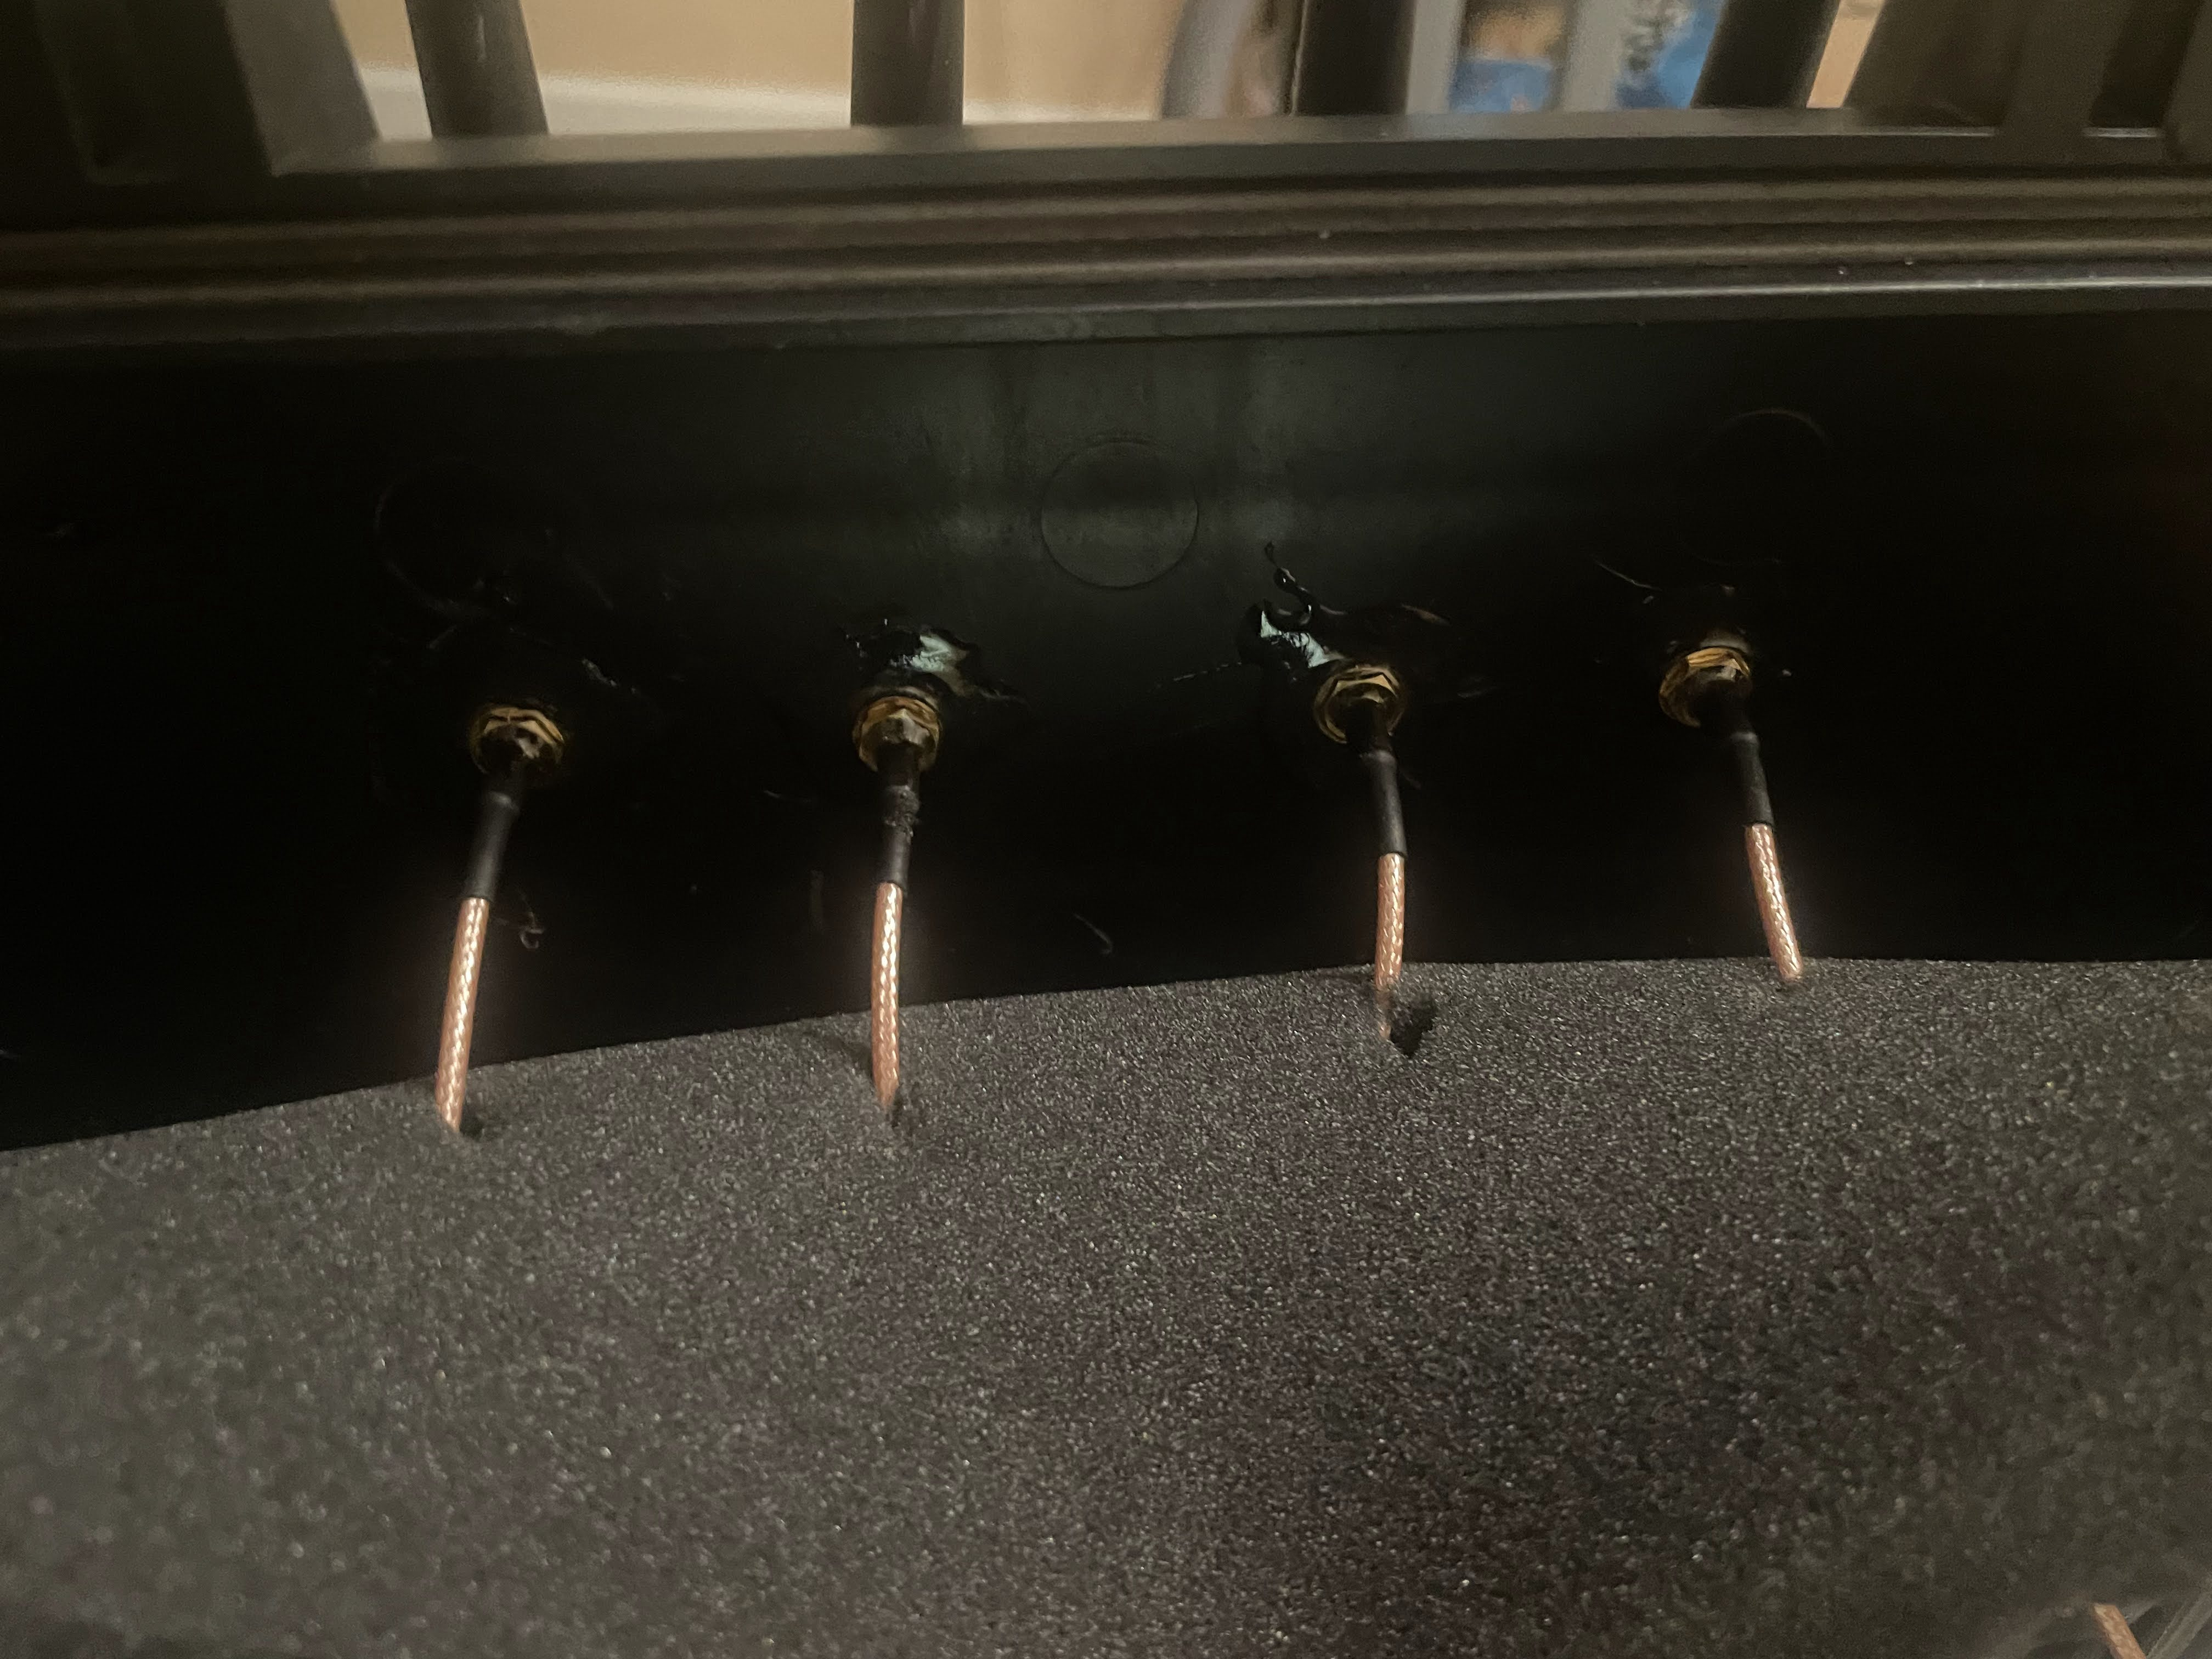
I used the included washers to secure things to the case, but I wasn’t super happy with how secure the fit was. To tighten everything up I hit the SMA extenders with two coats of JB-Weld Epoxy to ensure nothing would move around.
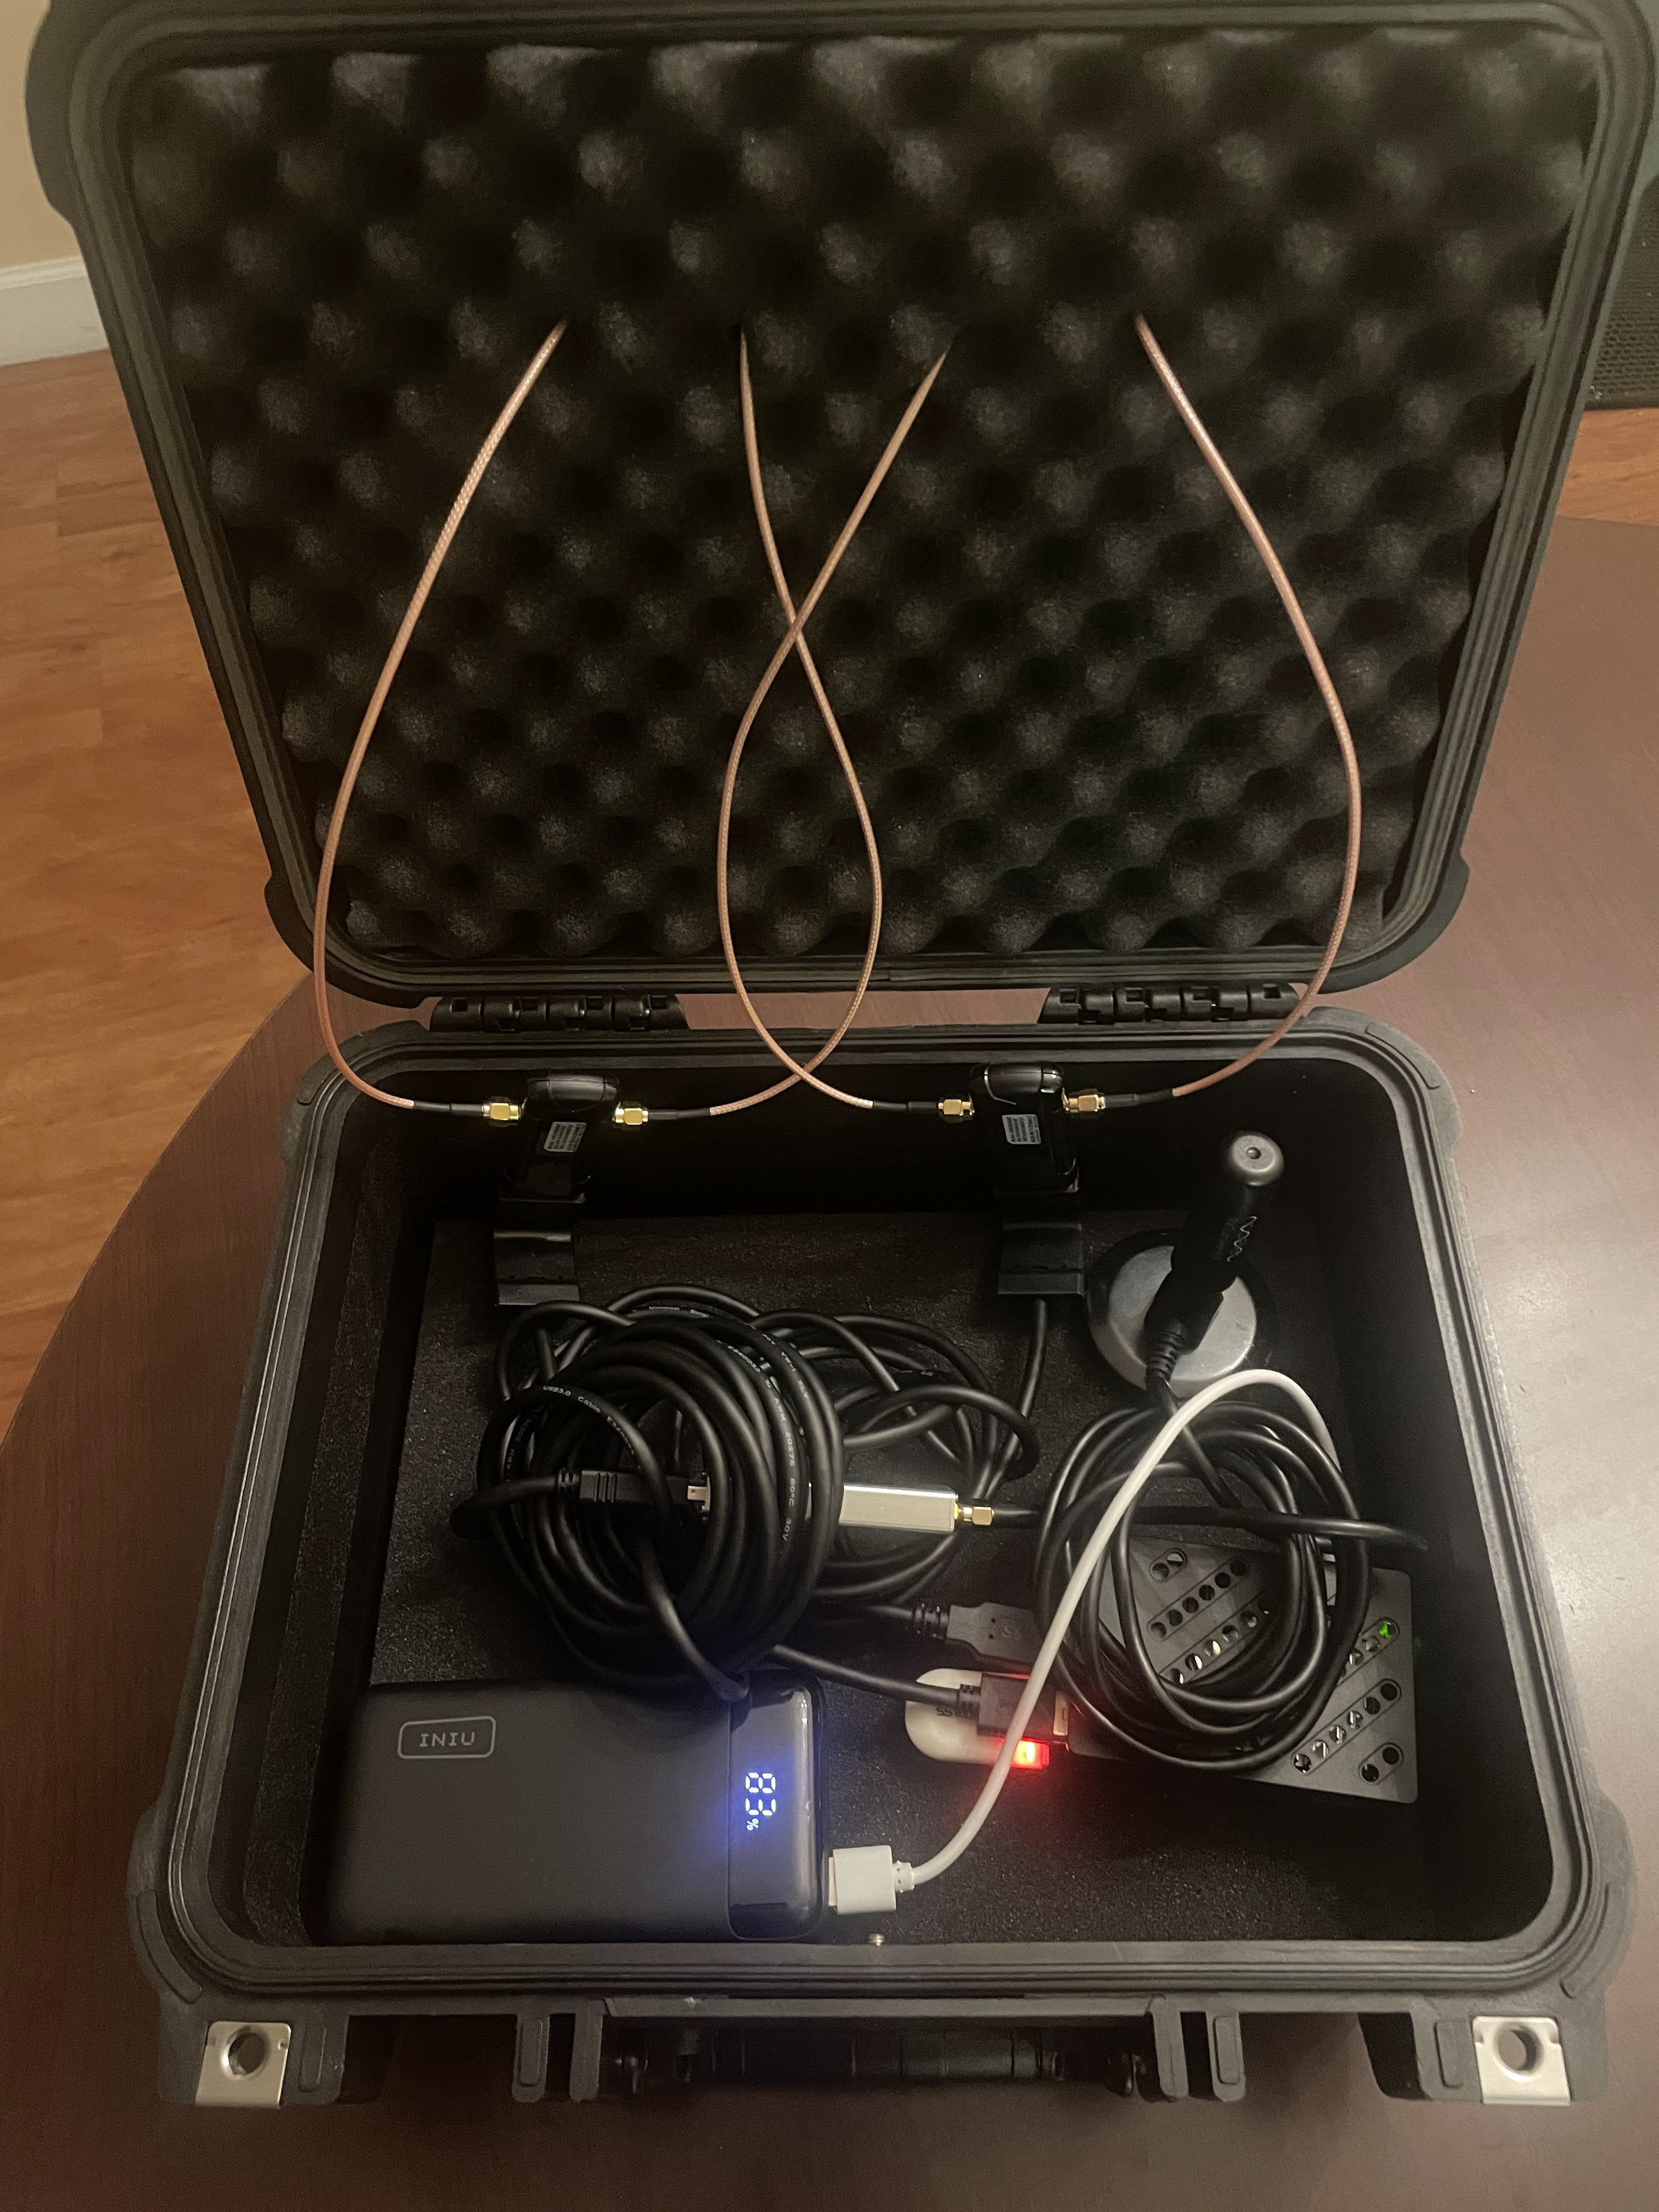
From there everything’s fairly straightforward, just plug it all in. My Harbor Freight case had some foam that I left in for padding, and I tried to keep the cables neat which was hard due to using so many extenders. I wasn’t able to fit the ALFAs/GPS/RTL-SDR on the Pi without using USB Extenders.
Software Setup
Raspberry Pi
I flashed the Pi with Raspbian Lite - originally I was planning on using Ubuntu Server but the newest 24.04 LTS release didn’t support the RPI5 at the time.
Next, I enabled SSH to allow remote management of the Pi.
1 | sudo systemctl enable ssh --now |
I also installed GPSd for use with the GPS Dongle.
1 | sudo apt install gpsd & sudo apt install gpsd-clients |
I set the following configuration in /etc/default/gpsd:
1 | # Devices gpsd should collect to at boot time. |
You may need to set a different device based on your GPS dongle.
Last up, I decided to use the NIC onboard the Pi to spin up a hotspot for management and remote access, this will allow access to the Pi via SSH, and access to the Kismet web server while warwalking.
1 | # Create the Hotspot |
Copy the UUID corresponding to the hotspot.

1 | # Make the hotspot autoconnect |
Kismet
To configure kismet, I first followed the outlined installation steps for a suid-root installation on Debian.
Next, I setup my kismet site configuration at /usr/local/etc/kismet_site.conf:
1 | server_name=belligerent |
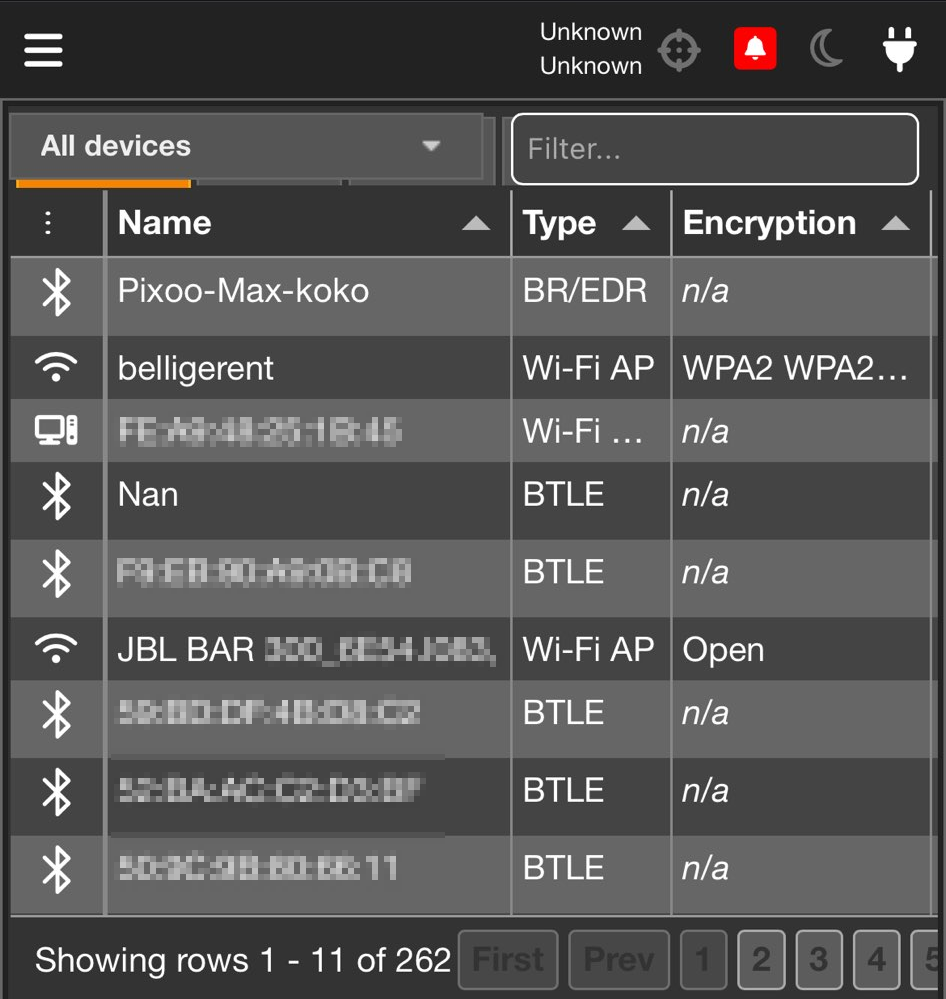
Now we can use kismet --daemonize to launch Kismet, browsing to http://[IP]:8000 we’re greeted with the Kismet dashboard.
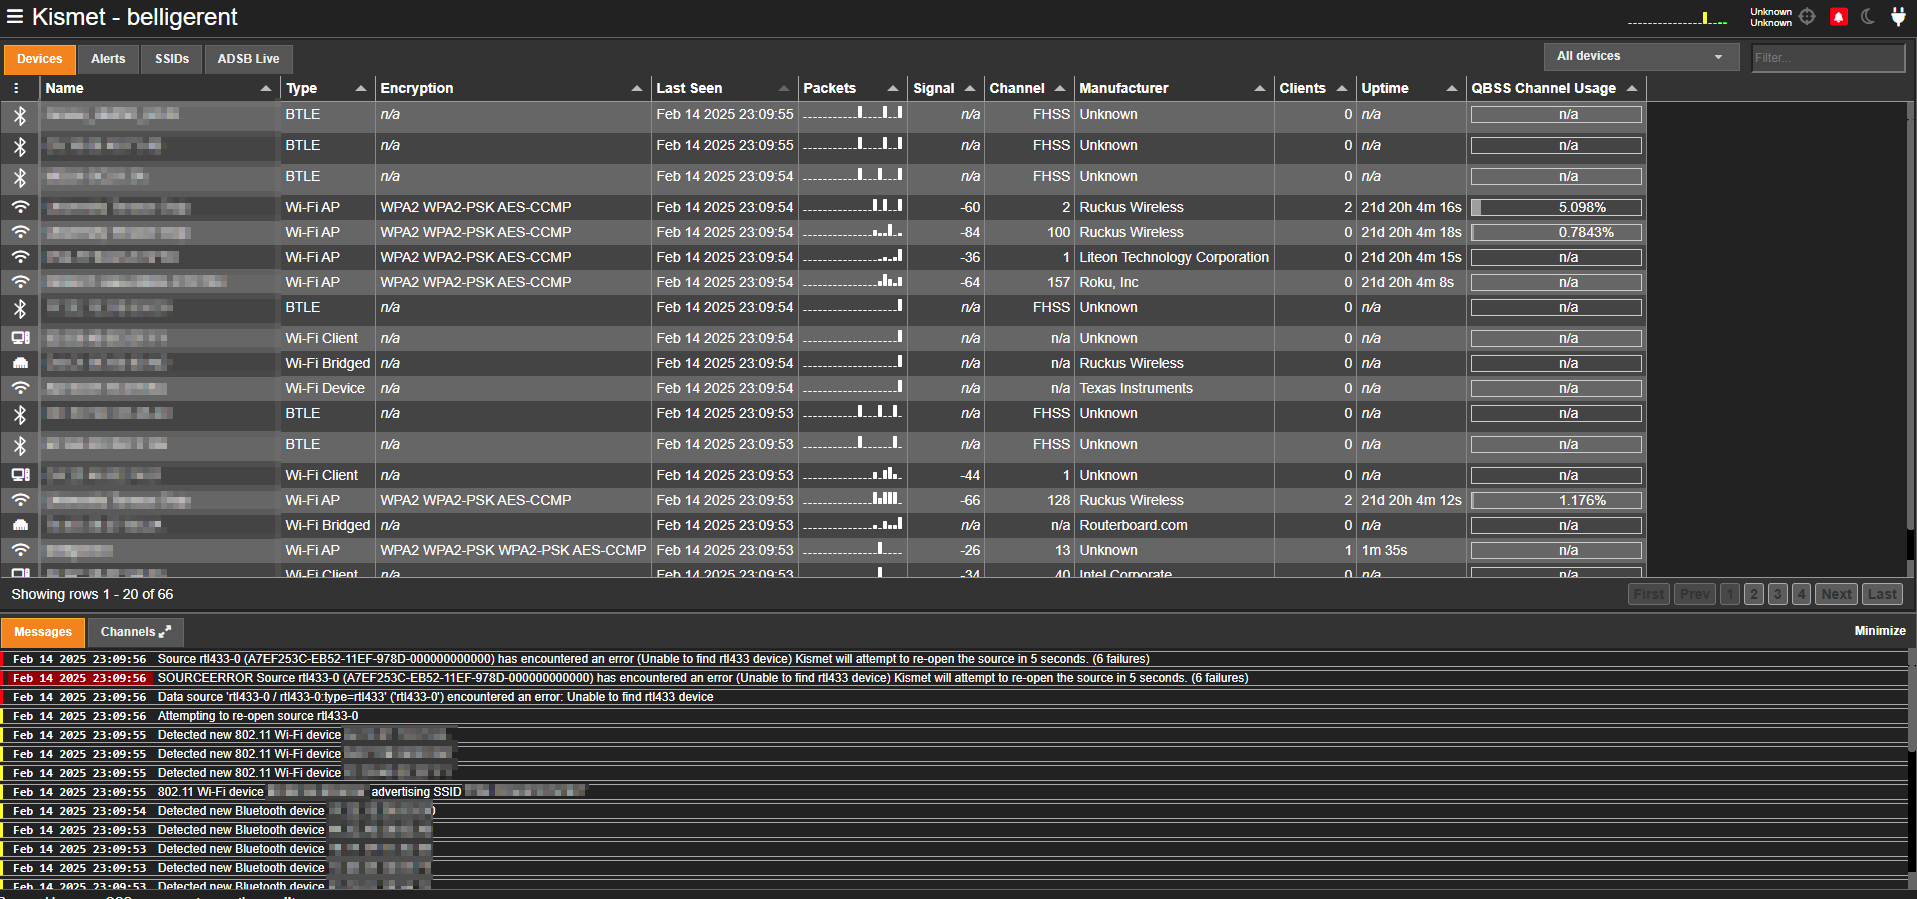
On this dashboard we can view the GPS status, bluetooth devices, wireless devices, and more. It’s also viewable on mobile via our hotspot we configured.
Data Collection
Now that everything was good to go I threw my case in a backpack, and started wandering around campus to collect data.
I noticed several issues with obtaining a GPS lock - and can’t really recommend the dongle in the bill of materials. I only really had success on sunny days, and sometimes had to literally hold the dongle in the air to receive a GPS lock.
Because of these issues, a chunk of the data I collected doesn’t have a GPS location tied to it, making it less useful. A GPS sensor with an external antenna or a more quality dongle would probably produce much better results.
What’s Next?
Having gone out and collected data, the next step is to analyze and view it. For this, I’m going to use the Elastic stack. ELK will enable us to make the Kismet data searchable, allow the creation of visualizations, and allow us to plot the data on a map.
To accomplish this, we’ll need to standup ELK, and create a logstash pipeline to ingest data from either a Kismet DB file, or the Kismet API. I found this repo which I plan to base my work off for the next portion of the project.
- Title: 🧙🛜 WarWandering: Pt 1
- Author: Liam Geyer
- Created at : 2025-04-09 00:00:00
- Updated at : 2026-06-07 23:05:14
- Link: https://lfgberg.org/2025/04/09/security/warwandering-1/
- License: This work is licensed under CC BY-NC-SA 4.0.